Configuring Remote Desktop for PS Controller Use
If you’re planning to game over RDP with a DualShock controller, it’s possible, and you’ll only need to edit some policies. No third-party tools needed.
For clarity, we’ll refer to the computer that your controller is attached to as the local computer.
Step 1: Edit Remote Desktop Group Policies
Edit Group Policies on the local computer. Type “gpedit” into the search bar and press Enter to launch the editor.
Navigate to the following policy:
Local Computer Policy > Computer Configuration > Administrative Templates >
Windows Components > Remote Desktop Services >
Remote Desktop Connection Client > RemoteFX USB Device Redirection >
Allow RDP redirection of other supported RemoteFX USB devices from this computer
Right-click it and select “Edit”. This should open a settings window, where you should change the policy’s status to “Enabled” and its access rights to “Administrators and Users”. Confirm the changes.
Type “cmd” into the search bar. In the search results, right-click “Command Prompt” and run it as Administrator. A command line will open, type in “gpupdate /force” and press Enter. Wait for the update to complete, and reboot.
Step 2: Update the Remote Machine
The remote machine needs to have certain policies enabled as well. Open gpedit like you did previously.
This time, go to:
Local Computer Policy > Computer Configuration > Administrative Templates >
Windows Components > Remote Desktop Services >
Remote Desktop Session Host
There are three policies that you will need to access from this directory:
Enable Remote Session Environment > RemoteFX for Windows Server 2008 R2 > Configure RemoteFX
Enable Connections -> Allow users to connect remotely by using Remote Desktop Services
And disable Device and Resource Redirection > Do not allow supported Plug and Play device redirection
Once again, open Command Prompt as an Administrator and run “gpupdate /force”. You can also quickly reboot from the command line by using “shutdown /r /t 0”.
Step 3: Connect the Controller to Your Local Computer
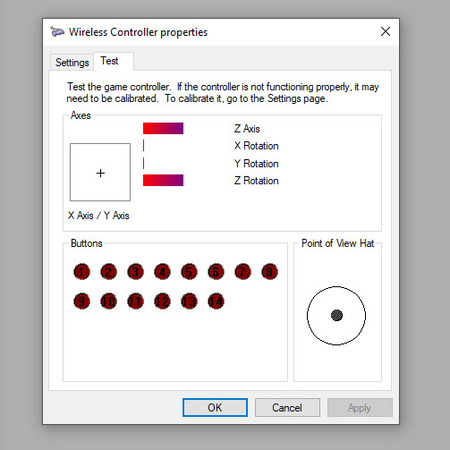
It’s time to connect the controller. You will have to connect it over USB, rather than Bluetooth. Optionally, you can open the Control Panel (like any other system app, this is easily done with search) and check if it’s been connected properly. To do this, right-click the controller, go to “Game Controller Properties” and then “Properties” again. You’ll be able to see if the input registers properly.

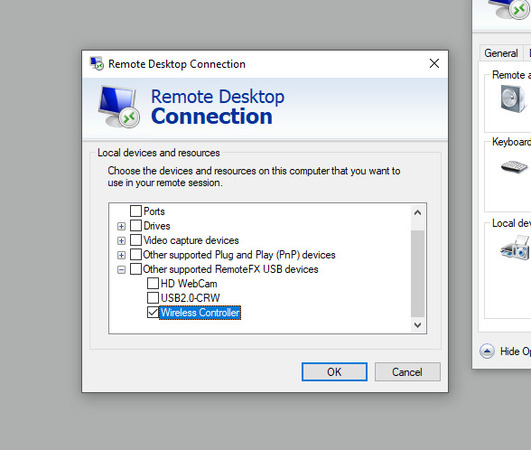
Finally, you need to enable this specific controller on the RD resource list. Type “mstsc” in search and press Enter to open the Remote Desktop Connection app. Switch to the Local Resources tab and choose “More…”

If everything was done properly, the gamepad should appear under “Other supported RemoteFX USB Devices”. Enable it, and you’ll be able to use it in future Remote Desktop sessions, given that the session host has been set up according to Step 2.


