Cookie
FlexiHub Team uses cookies to personalize your experience on our website. By continuing to use this site, you agree to our cookie policy. Click here to learn more.
Olga Weis Olga Weis Last updated Jul 29, 2024

Remote Desktop Camera Redirection: A Complete Guide

Setting up a remote desktop camera passthrough can be challenging. You may need to go through a complex setup to use your webcam in a session. This article will help, but we will also suggest simple-to-use and advanced tools for remote desktop redirection, such as FlexiHub.

Configure Webcam over RDP Natively

MSTSC - the Microsoft Terminal Services Client - is an RDP client available by default on most versions of Windows, including newer ones. It supports webcams. However, the Pro edition is necessary for the device that is hosting the session. The client is generally easy to set up and access, and enabling the webcam in it won’t be a challenge, but high performance isn’t guaranteed.

NOTE: Webcam usage on an RDS server requires significant CPU resources. This is in part due to the CPU cycles needed to transmit the raw USB data through RDP.

Another potential problem is network latency. Redirecting webcam traffic with an RDS server requires a considerable amount of network bandwidth to achieve smooth and reliable communication.


To enable webcam access before starting your session, do the following on the client side:
  • 1.
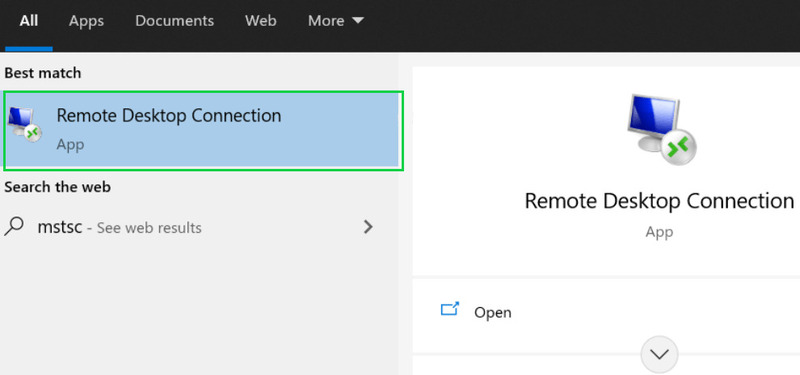
    Start MSTSC from the search bar, either by searching for “mstsc” or “remote”.
    open remote desktop connection
  • 2.
    Once the client opens, open more options from “Show Options”.
  • 3.
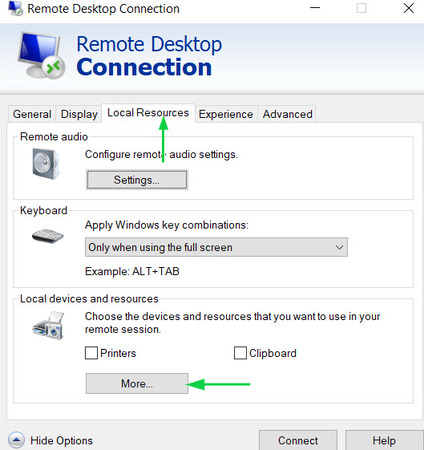
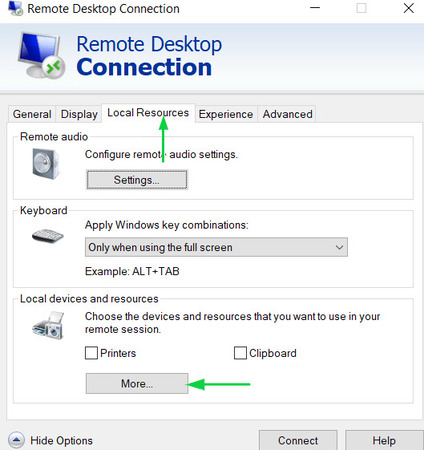
    Go to the “Local Resources” tab and click “More”.
    in the  “Local Resources” tab  click “More”
  • 4.
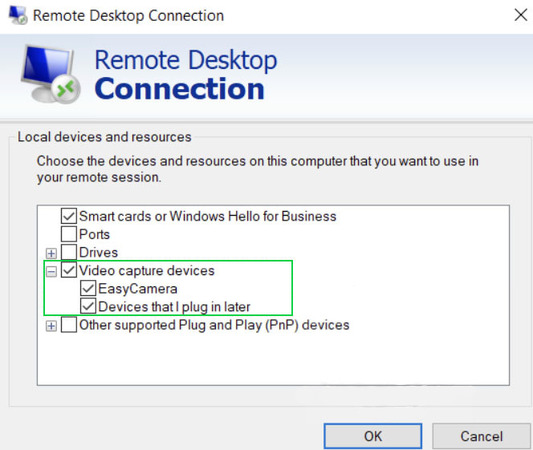
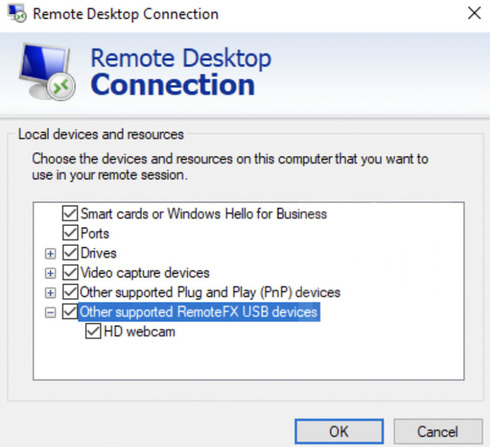
    Either enable “Video capture devices” in general, or open the category and find your webcam, if connected.
    enable “Video capture devices”and find your webcam

Now, if you’re managing both ends of the session, set up the server:

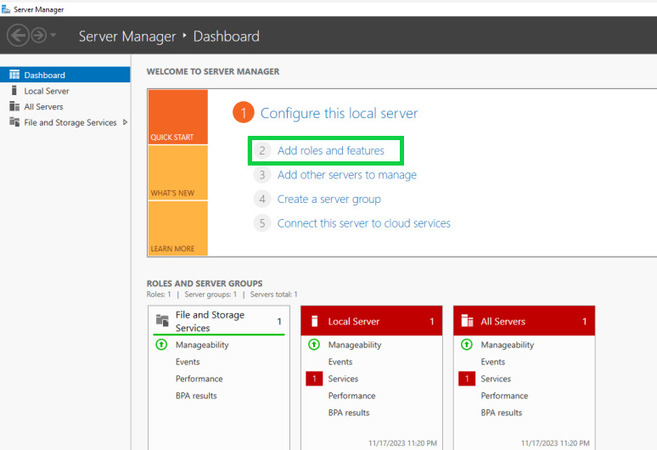
  1. Search for “server” in the search bar and open the Server Manager.
  2. Select “Add roles and features” from the Dashboard. Select “Add roles and features”
  3. Choose “Role-based or feature-based installation” and select the host server.
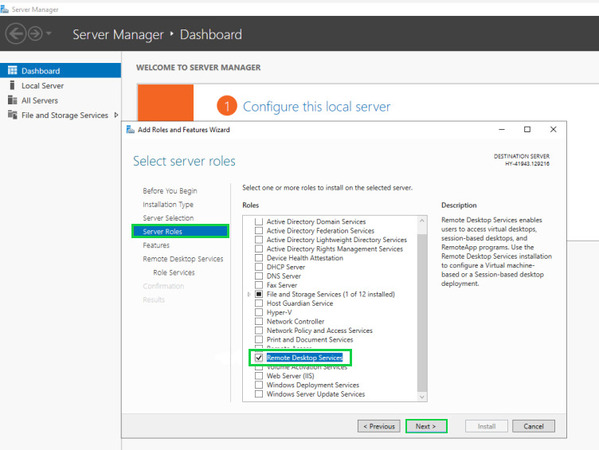
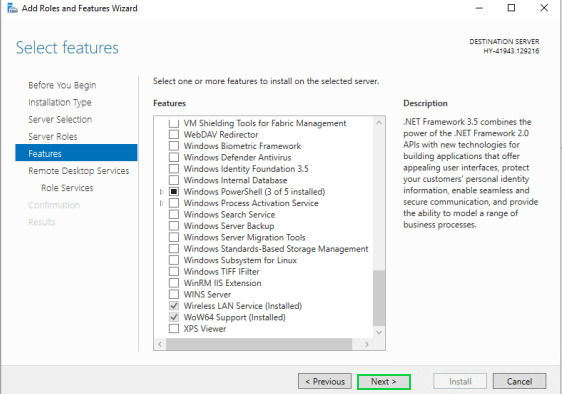
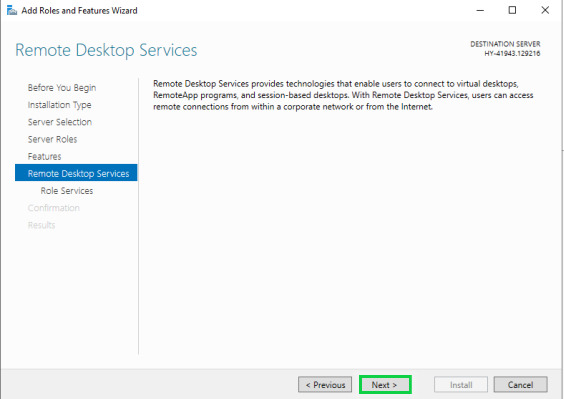
  4. Enable “Remote Desktop Services” under Server Roles and skip through Features. Enable “Remote Desktop Services” skip through Features
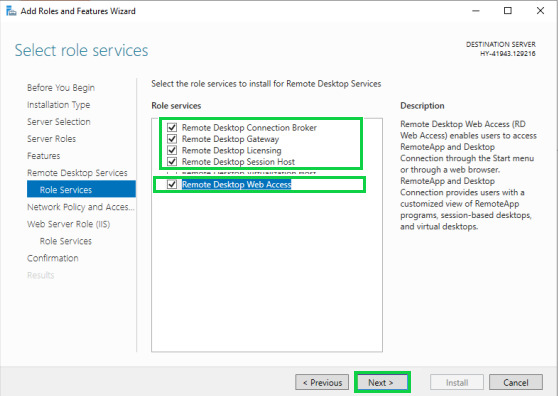
  5. Under Role Services for Remote Desktop Services, enable Connection Broker, Gateway, Licensing, Session Host, and Web Access. Under Role Services go to  Remote Desktop Services enable Connection Broker, Gateway, Licensing, Session Host, and Web Access
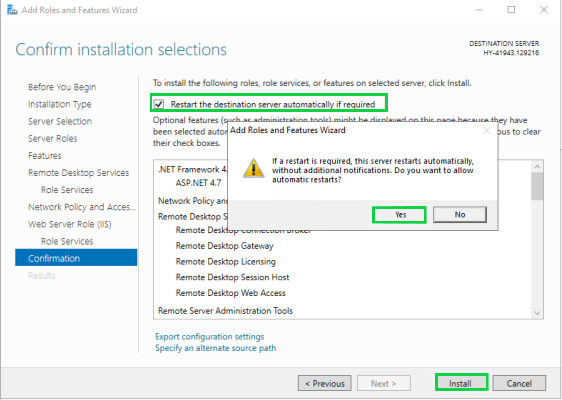
  6. You can now skip through to the end, the setup is done. Restart the server. Restart the server

The server should be visible in MSTSC and available for connection, with webcam support.


Connect webcams to RDP sessions
30-day demo period

USB Webcam Redirection with RemoteFX

RemoteFX is a component that can improve the visual quality and overall performance of RDP sessions, and this includes USB passthrough for webcams as well. It requires specific group policies to be modified on the host and the client. GPO modification to allow webcams can carry security risks, so be cautious and consult security specialists if you’re planning to do this in a work environment.

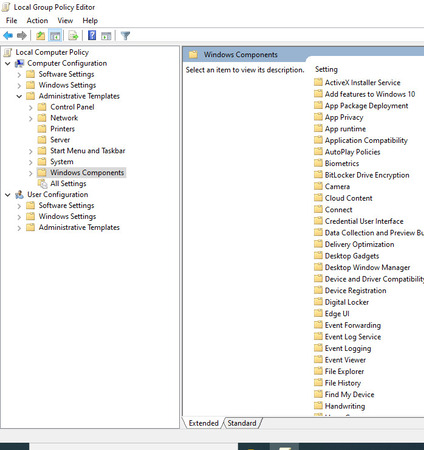
open the Local Group Policy Editor

To open the Local Group Policy Editor, search for “group” and select “Edit Group Policy”. All the necessary policies can be found under “Computer Configuration” > “Administrative Templates” > “Windows Components” > “Remote Desktop Services”, both on the client and on the host. Use the “Administrators and Users” group whenever possible.

On the client, you need to go to “Remote Desktop Connection Client”, then “RemoteFX USB Redirection”, and enable “Allow RDP redirection of other supported RemoteFX USB Devices from this computer”.

On the server, go to “Remote Desktop Session Host”. Several settings will need to be changed:

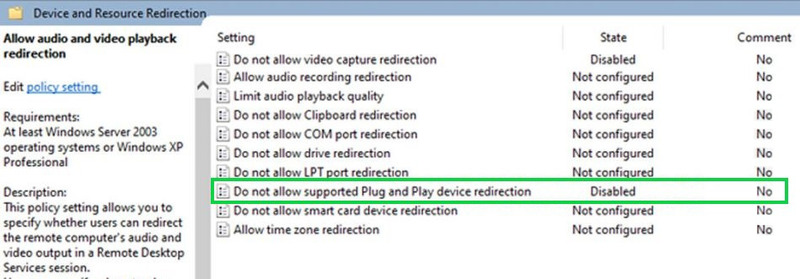
  • - Under “Device and Resource Redirection”, enable audio and video playback redirection and disable “Do not allow supported Plug and Play device/video capture redirection”, which may affect a webcam. Select “disable “Do not allow supported Plug and Play device/video capture redirection”
  • - Under “Remote Session Environment”, enable “RemoteFX for Windows Server 2008 R2” > “Configure RemoteFX”.

You can restart the machine to apply new policies, or, to be safe, run “gpupdate /force”. The next time you start a session through MSTSC, enable all local devices and resources so your webcam is allowed to connect.

under “Local Resources“  click on “More“

“Show Options” > “Local Resources“ > click on “More”> Select all the options available under “Local devices and resources”

Select all the options available under “Local devices and resources”

Enter the server credentials, including the username and password. Once you have provided this information, you can proceed with establishing the RDP connection.

Share webcams to RDP with remote desktop webcam software

One problem you may encounter when trying to share a webcam over RDP is getting the remote session to recognize the physical peripheral device.

We are going to show you a solution that makes it easy for a remote desktop to use a local webcam. It solves the problem of accessing locally attached USB devices for RDP users.


FlexiHub
4.8 Rank based on 386+ Reviews
FlexiHub

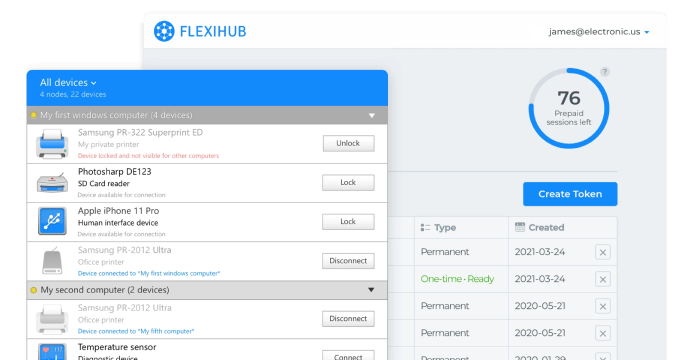
FlexiHub is a reliable and high-performance tool that enables redirected webcams to operate with any video conferencing software.

USB peripheral devices made available to RDP sessions with FlexiHub provide the same functionality for a locally connected piece of equipment on the remote machine.

FlexiHub uses virtualization to make it appear as if your RDP session is directly connected to a webcam attached to the local host computer. You don’t need any additional configuration to achieve clear and reliable video transmission. FlexiHub allows you to enjoy high-quality and low-latency video conferencing from any remote desktop session.


How to use a webcam with a remote desktop session

Follow these simple steps to use a local webcam on a remote desktop:
  • 1.
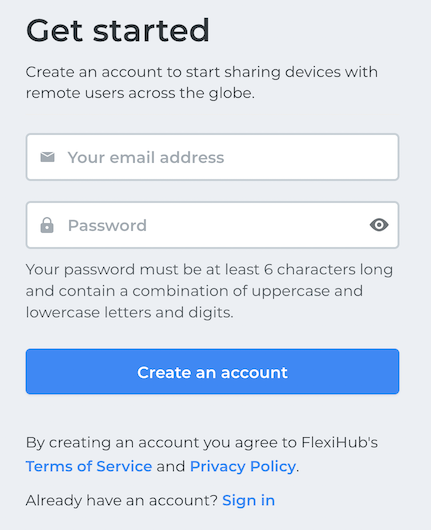
    Register for a FlexiHub account on their official software website.
    flexihub account registration
  • 2.
    Download and install the FlexiHub program on all computers that will be involved in the connection to the USB device. This includes the computer with a direct connection to the peripheral that will be shared and all of the remote machines that will share access to the device. blank
  • 3.
    Start FlexiHub and log in to your account. As soon as the login is complete, the device is automatically made available for access by remote users.
    log in to your account
  • 4.
    Start a Remote Desktop client so you can connect to a remote virtual desktop.
    Start a Remote Desktop client
  • 5.
    Start the FlexiHub app on the virtual desktop and log into the FlexiHub account using the same credentials. blank
  • 6.
    The devices that are available for remote access will be displayed in the app’s main interface. Select the device you want to access and click the Connect button next to its name to establish the connection.
    select the device you want to access and click the connect


Watch this video for the visual instructions on how to use a webcam in remote desktop:


After communication is established, the device will be recognized by the remote computer and appear in its Device Manager. The virtualized devices offer remote users the same functionality of a direct physical connection.

Benefits of remote desktop webcam software

✦ Supports a wide range of webcams

FlexHub does not require any special configuration to provide remote access to a wide variety of USB hardware devices.

✦ Compatibility with popular video conferencing solutions

This webcam for RDP redirection software works with all popular video conferencing applications. The tool supports Skype, Zoom, Slack, Google Hangouts, and many others.

✦ Advanced security

The security of your communication is vitally important and FlexiHub uses 2048-bit SSL encryption to safeguard data transmission. Shared webcams are fully protected from misuse when accessed through FlexiHub and your network.

✦ Redirect webcams to multiple platforms

This flexible software solution supports cross-platform configuration of Windows, Linux, and Mac remote desktops. Any platform can act as the server for clients of any other supported platform. Users on a Windows remote desktop can use webcams connected to Linux or Mac servers.

✦ Webcam drivers are not required

Client computers do not need to have webcam drivers installed to be able to access the shared peripheral. This feature eliminates the troublesome and potentially time-consuming of installing drives for each new device introduced to the environment.

✦ Optimize network traffic

Data transfer compression helps minimize the stress of transmitting video streams through your network. It also speeds up your interaction with the remote desktop cameras.

Redirect remote desktop camera
  • 4.8 overall rank based on 386+ Reviews
  • Requirements: Windows, macOS, Linux, Android and Raspberry Pi.
  • 10.76MB Size.
  • Version 7.0.15125. (3 Jun, 2024).
  • Pricing starts $14 per month billed annually